Creating a product is simple and easy with the WP Express Checkout Plugin.
Once you have the WP Express Checkout Plugin installed and activated on your WordPress website and you have configured the required settings (see this documentation for the basic setup details), you are ready to create your first product.
Table of Contents
- Video Tutorial
- Step 1) Creating a Product or Service
- Step 2) Adding a Product to a WordPress Post/Page
- Step 3) Viewing the ‘Buy Now’ Button on the Front-end
- Using the ‘Template’ Shortcode Parameter to Display a Product
- Embed a Simple Payment Button
- Simple Text Link or URL for a Product
- The Shop/Products Page
- Testing a Transaction
- Typical Product Checkout Process Demonstration
Video Tutorial
Step 1) Creating a Product or Service
Follow the steps below to create a product which you can sell to your customers:
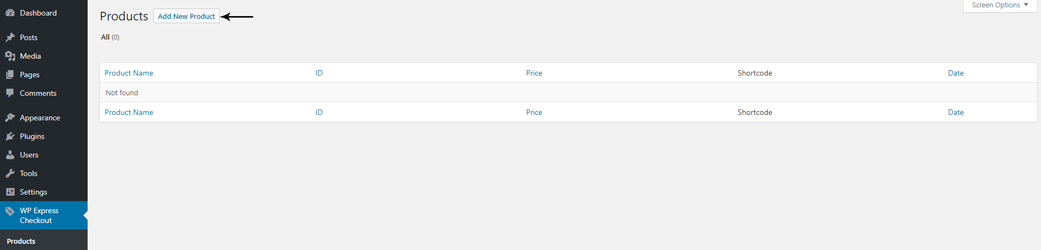
Navigate to the ‘Add New Product’ Interface
Click on the WP Express Checkout menu and then click on Products. Once you create a product you will be able to find them listed here.
To create a new product, click on the ‘Add New Product‘ button. This will open the ‘Add New Product’ interface, where you can configure various fields to set up your product.
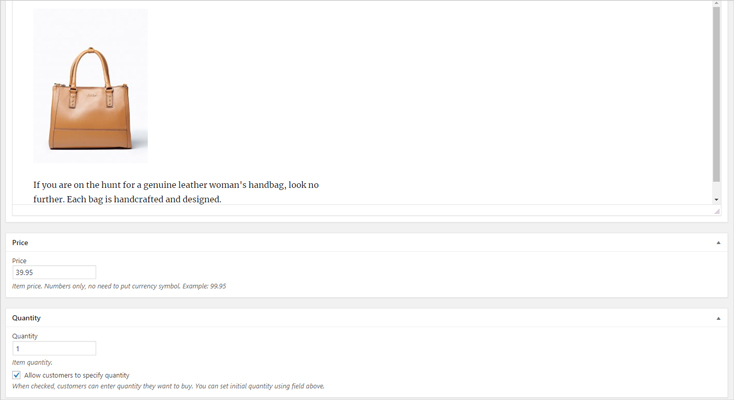
Configure the Product Details
For your product, you will need to configure the following fields:
- Title: Name of your product or service.
- Description: Explanation of the product or service.
- Price: The price the customer will pay for one unit of the product or service. To alter the currency display, please refer to the following documentation.
- Quantity: Set the amount of the product or service the customer will purchase, or allow customers to specify their own quantity.
- Download URL: Choose the file the customer will receive if offering a digital product.
- Product Thumbnail: Add a photo of the product or service you are selling.
Publish the Product
After entering values into the fields to create your product, click the ‘Publish’ button. This will publish your product, and it will appear under the WP Express Checkout plugin’s Products menu.
Step 2) Adding a Product to a WordPress Post/Page
After creating your product, the next step is to add it to a WordPress post or page so customers can easily click the ‘Buy Now’ button and complete the PayPal checkout process. Customers can pay using their PayPal account or enter their credit card details to purchase your goods or services. Adding a ‘Buy Now’ button to your WordPress site is quick and straightforward—simply copy and paste a shortcode or use a product block. Follow the steps below to seamlessly integrate the ‘Buy Now’ button into your website.
Using a Shortcode
OR
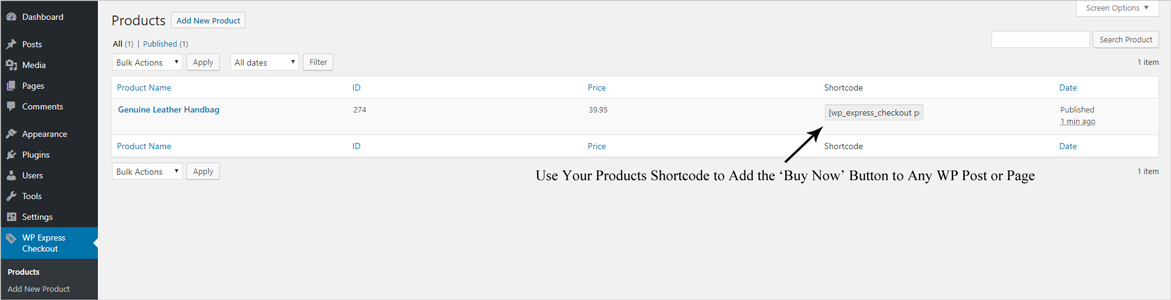
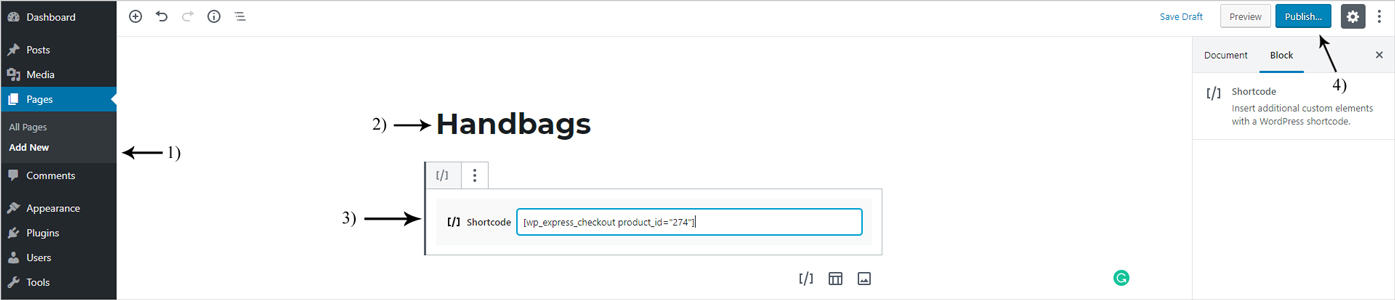
- Click on the WP Express Checkout menu in your WordPress dashboard, then select ‘Products‘. All the products you have created will be listed here.
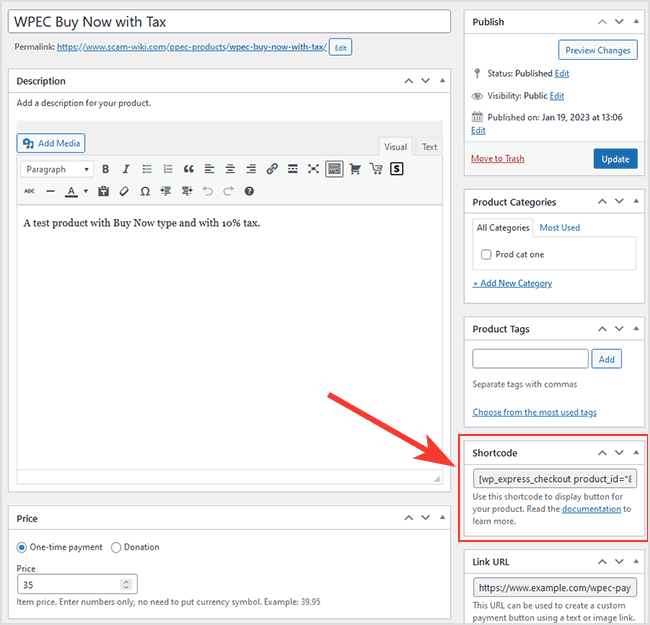
- Copy the shortcode for the product you want to display a ‘Buy Now’ button for on your website. You can find the shortcode in the ‘Shortcode‘ column within the appropriate product row, or in the individual product edit interface.
- Create a new WordPress ‘Post‘ or ‘Page‘.
- Add a WordPress ‘Shortcode‘ block and paste in the shortcode that you have copied.
- Save the post/page.
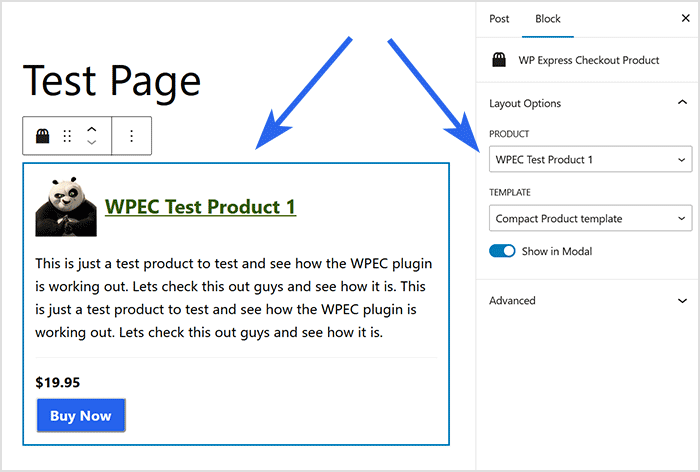
Using a Product Block
Alternatively, use the ‘WP Express Checkout Product’ block to add a product block to your page. Refer to the screenshot below for an example.
Step 3) Viewing the ‘Buy Now’ Button on the Front-end
Once you’ve added your product’s shortcode or block to a WordPress page and published it, a ‘Buy Now’ button will appear on the front end of your website.

or
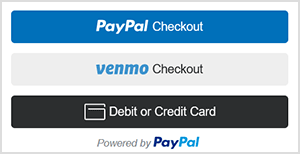
If you have kept the default ‘Checkout Form’ setting to show in a popup/modal, the ‘Buy Now’ button will trigger an overlay window with the PayPal checkout buttons. Otherwise, the PayPal buttons will appear directly on the page.
Using the basic shortcode will only add the product’s ‘Buy Now’ button to your WordPress post or page. To display your product details along with the purchase button, use one of the WP Express Checkout product ‘Templates’ mentioned in the section below.
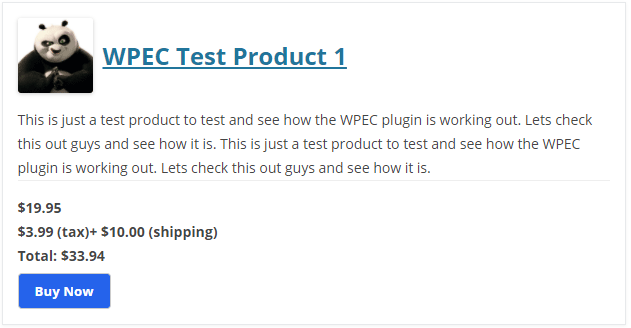
Using the ‘Template’ Shortcode Parameter to Display a Product
Using the ‘template’ parameter within the product shortcode will enable you to display further details about the product along with a purchase button.
If you wish to use a template to display your product on a WordPress post or page, please see the following documentation for current template options.
Use the following shortcode to display a product with some of the product details
[wp_express_checkout product_id="1234" template="1"]
The following screenshot is an example of how the product display looks like when embedded on a page using the above mentioned shortcode.
Embed a Simple Payment Button
If you have a landing page and only need a simple Buy Now button (without displaying product details), refer to this documentation.
Simple Text Link or URL for a Product
Read this documentation to learn how you can use a Text Link or a simple URL (instead of the standard Buy Now shortcode)
The Shop/Products Page
When you create a product, it also gets showcased on the Shop/Products page of your site so a visitor can browser your products.
Testing a Transaction
You can use the ‘Buy Now’ button to complete test transaction to better understand the process that your customers will complete to purchase an item on your website. Read the testing a transaction documentation for more details.
Typical Product Checkout Process Demonstration
In the following video, you can see how the usual process of purchasing and checking out a product works from the perspective of your customers.