If you use the free WP Express Checkout Plugin, you can create donation-style products that when displayed on a WordPress post or page will allow the customer to make a donation. This feature allows customers to make a donation payment using either their PayPal account or a credit/debit card.
If you run a charitable website, you may have the need to insert donation-style payment buttons. Donation buttons can be created where they have a minimum donation amount. The customer can then donate the minimum amount or enter the price they would like to pay (higher than the minimum) in exchange for a product or service or in some cases nothing other than goodwill.

Considerations When Creating a Donation Product
When you create a donation-style product on your website, be mindful of the minimum amount you enter within the product ‘Price‘ field. PayPal takes a percentage fee from each successful transaction so ensure you have specified an amount high enough so that the donation does not entirely go to fees.
While you need to create a ‘product‘ to be able to add the donation button to your website, this does not necessarily mean you need to give a product in return for the donation. Use the description area of the ‘Add New Product‘ interface to clearly outline what the donation will be used for and if the visitor can expect a physical or digital item in return for the donation or if it is purely a matter of goodwill.
On the ‘Thank You‘ page, which can be found in the ‘Pages‘ menu of your WordPress website, you may like to thank your customers for their generous donations and even add some images of how their donation is helping the charity/cause. You can read more about customizing the Thank You page here.
Creating a Donation Style Product
Video Tutorial: WP Express Checkout Donation Product
Written Tutorial: WP Express Checkout Donation Product

- Ensure you have the WP Express Checkout plugin installed and activated on your WordPress website.
- Click on the ‘Add New Product‘ menu found under ‘WP Express Checkout‘ in your WordPress dashboard.
- Configure the basic product as per usual by giving it a ‘Title‘, ‘Description‘, ‘Thumbnail Image‘ and ‘Download URL‘ (if applicable).
- In the ‘Price‘ field, click on the ‘Donation‘ option. Add the minimum amount you would like the customer to donate/pay in the appropriate field. Your minimum ‘Price‘ will be the default amount, although the customer can easily override this to any amount of their choosing (higher than the set price).
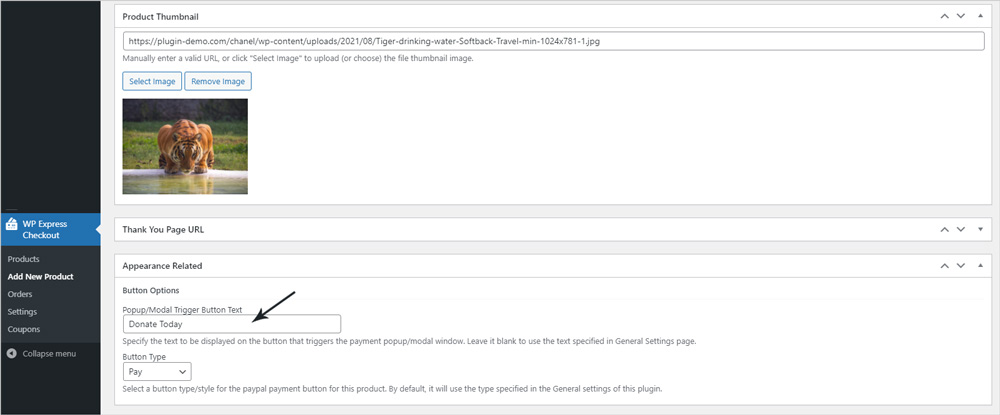
- In the ‘Appearance Related‘ section of the ‘Add New Product‘ interface, choose the most appropriate ‘Button Type‘ for this donation style product. The default button type chosen in the settings menu will be used unless you choose another option from the drop-down menu. For a donation product, it makes the most sense to use either the ‘Checkout‘ or ‘Pay‘ option especially if you will not be giving anything in return for the donation. You may also like to edit the text that will appear on the ‘Popup/Modal Trigger Button’.
- Click the ‘Publish‘ button to publish out the donation style product you have created.
- Now that you have created your donation style product, you can copy the product shortcode and add it to any of your WordPress posts or pages. You can find more about adding the product to your website here.
What Will My Donation Product Look Like?
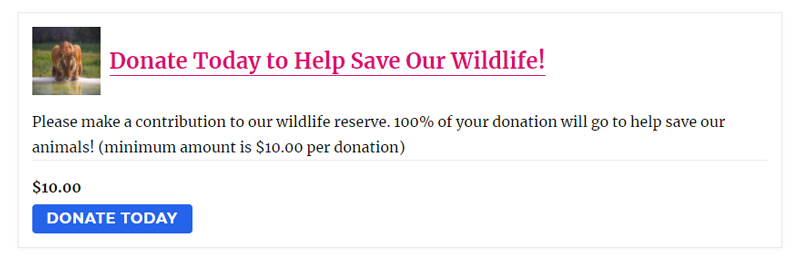
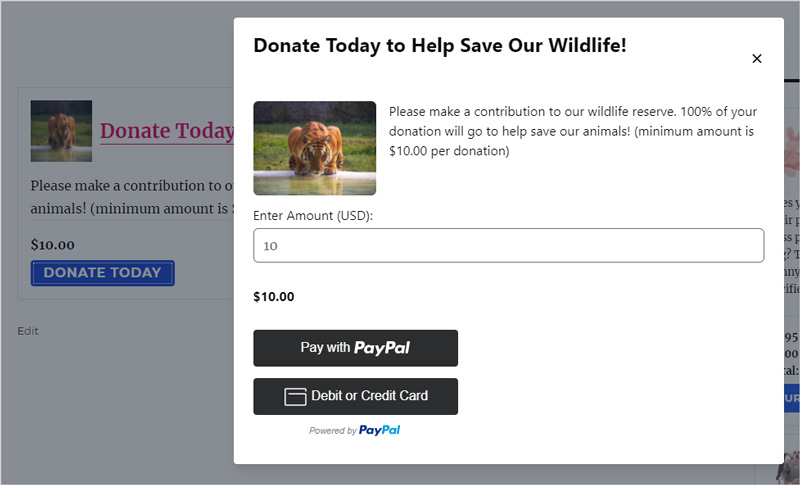
Once you create your donation product and you add it to a post or a page, your customers who view it from the front end of your website will see a payment button. In our example, we titled our button ‘Donate Today’. When the customer clicks on your ‘Popup/Modal Button’, the minimum amount you have chosen will be the default amount in the pricing box. They can choose to pay that amount, or simply override it with an amount higher than the minimum amount. The customer will then be able to make the payment with their PayPal account or credit or debit card. The checkout flow is the same for a donation as it is for a regular payment.
If you use a template shortcode as we have in our screenshots, your visitor will see more details about the donation. You may like to use the description field of the product to outline what the donation will be used for. Explaining the cause in detail will increase the chances of receiving a donation.
How Can I Keep Track of the Donations?
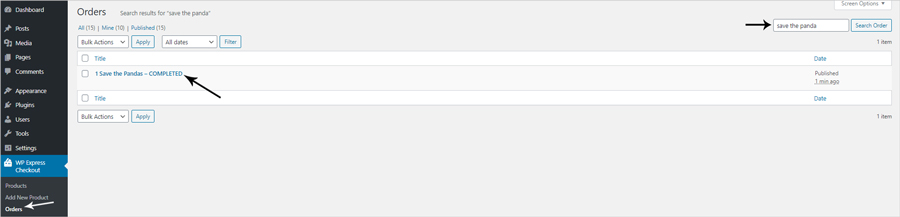
Every time a visitor makes a donation on your website, it will come through as a transaction in the ‘Orders‘ menu found under ‘WP Express Checkout‘. You can search your orders by the name of the product to display all of the donations.