When using the WP Express Checkout Plugin, two types of emails can be sent – one to the buyer upon successful purchase of a product and the other to the seller upon the completion of a transaction. This documentation will explore the necessary configurations to ensure that both emails are dispatched as per your preference, along with instructions on how to edit the content of each email.
Table of Contents
Email Settings
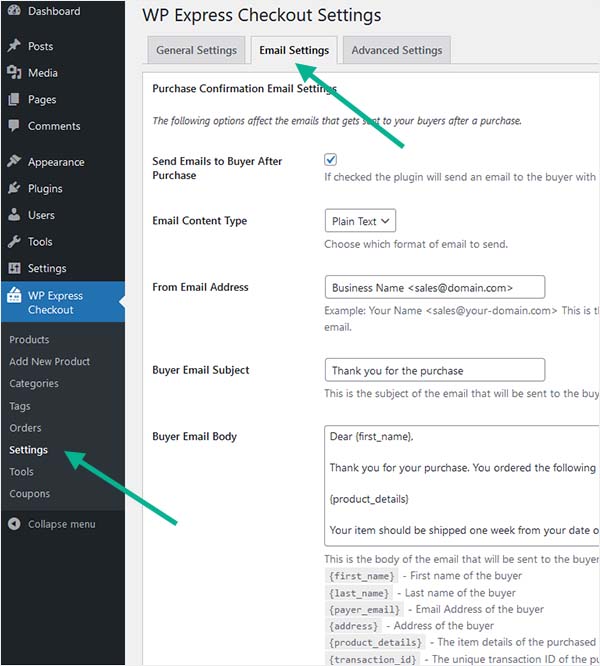
- Click on the WP Express Checkout plugin’s ‘Settings‘ menu and then go to the ‘Email Settings‘ tab.
- If you wish to send your purchaser an email after a successful transaction ensure that the ‘Send Emails to Buyer After Purchase‘ checkbox has been marked.
- Ensure that the ‘From Email Address‘ is correct. This is vital in ensuring that the email is sent from your website to the purchaser. This email should follow this format: ‘Your Name <[email protected]>’. You will need to replace ‘Your Name‘ with your name and ‘your-domain‘ with your websites domain name.
- You may choose to edit the subject and body of the ‘buyer‘ email.
- If you wish to send an email notifying the merchant of a purchase, ensure the ‘Send Emails to Seller After Purchase‘ checkbox is enabled.
- Ensure the sellers email address is correct.
- You may choose to edit the ‘Subject’ and Body‘ of the seller email.
- Ensure you click the ‘Save Changes‘ button.
- It is a good idea to complete a test sandbox transaction to ensure that emails are being sent out correctly. Ensure you have enabled the debug logging feature before testing so that you can locate the source of any errors you may face.
The email settings menu’s whereabouts can be seen in the following screenshot.
Sender’s Name and Email Address
In the “From Email Address” field, you have the option to personalize the sender’s address for outgoing emails. To customize both the sender’s name and email address, use the format:
Your Name <[email protected]>Replace Your Name with your actual name and your-domain.com with your website’s domain name.
For improved email deliverability, it’s recommended to use an email address associated with your domain.
Email Merge Tags
There are a number of different merge tags that you can add to the body of emails sent to the purchaser and the seller after a successful purchase.
Read the email merge tag documentation to learn about the available merge tags of the Express Checkout plugin.
Per-Product Email Customization
Read the per-product email customization documentation to learn about this feature.