Using the WP Express Checkout Plugin, a website owner can easily sell both physical and digital products to their customers. If you intend on selling a large number of digital files, you may prefer to store some of the files on Google Drive. Google Drive is cloud-based storage, that is secure and allows you to access your file/s wherever there is internet access. By using Google Drive to store your digital products, you can ensure that they are easily accessible and secure, while also reducing the load on your own website’s server. In this tutorial, we will look at how a digital product that is stored on Google Drive can be inserted into the product creation page of the WP Express Checkout Plugin so that prospective customers receive their digital purchase after a transaction is complete.
Table of Contents
- Video Tutorial: How to Sell Downloadable Products Hosted on Google Drive
- Written Tutorial: How to Sell Downloadable Products Hosted on Google Drive
Video Tutorial: How to Sell Downloadable Products Hosted on Google Drive
Written Tutorial: How to Sell Downloadable Products Hosted on Google Drive
To generate download links for your products using WP Express Checkout, follow these steps:
Step 1) Compress Your Digital Asset into a ZIP File
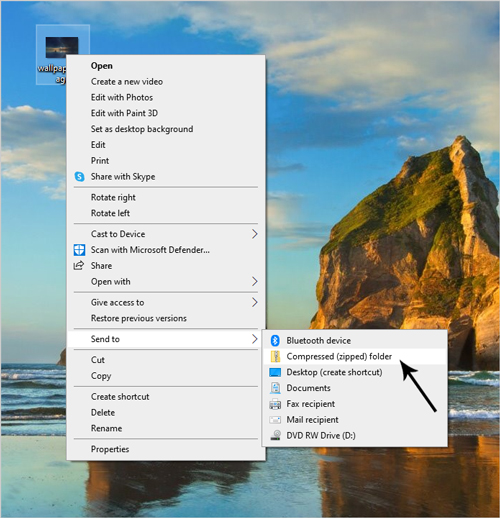
For optimal results, it is advisable to use a ZIP file format. This involves placing your desired file(s) within a designated folder and then compressing it using the ZIP format. This compressed file can then be utilized as a downloadable file. You can achieve this by saving the file to your computer’s desktop and compressing it to a zipped folder.

Step 2) Copy the Google Drive Shareable Link
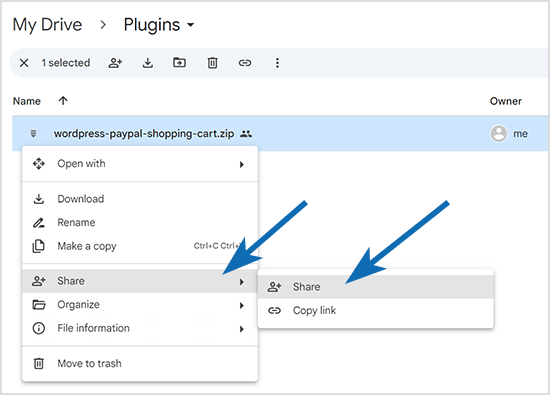
To sell your files, you can upload them to Google Drive and obtain a shareable link for each file. You can achieve this by right-clicking on the file within your Google Drive and then clicking the “Share” option. See the following screenshot for reference.

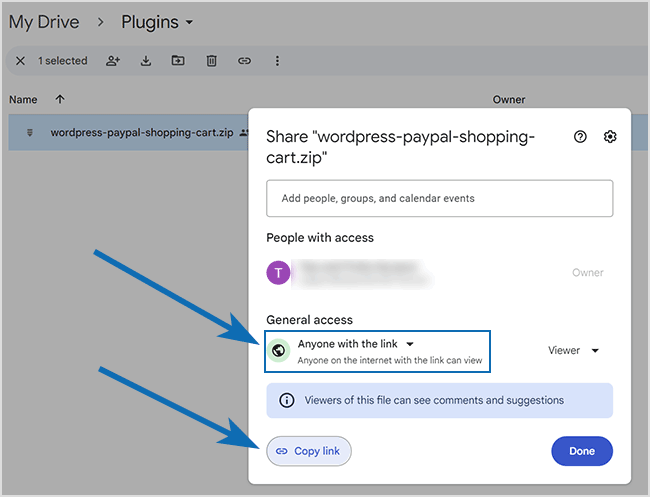
You will then see the option to set the permission for the file and then copy the link.
Make sure the “General access” is set to “Anyone with the link“. Then click on the “Copy link” button to copy it. See the following screenshot for reference.

Paste the link and save it on a notepad or a similar tool to proceed with the following steps.
Step 3) Locate the File ID
Get the file ID from the link by finding the string of characters between “/d/” and “/view”. For example, let’s examine the following link:
https://drive.google.com/file/d/1gu1x8AFgYewjrWVvRCIJ7ftEN1GQGG3m/view
The file ID from the above link is: 1gu1x8AFgYewjrWVvRCIJ7ftEN1GQGG3m
Step 4) Convert the Google Drive Shareable Link Format
Convert the file link into the following format:
https://drive.google.com/uc?id=<ID>&export=download
Replace “<ID>” with your actual file ID. The new file link will look like the following:
https://drive.google.com/uc?id=1gu1x8AFgYewjrWVvRCIJ7ftEN1GQGG3m&export=download
Step 5) Use the Download Link in the Product
After successfully uploading your digital content to Google Drive and obtaining the download link in steps 3 and 4, you can proceed to insert this link into the “Download URL” field on the product creation page of WP Express Checkout. After inserting the download link into the “Download URL” field on the product creation page of WP Express Checkout, fill out the rest of the page according to your preferences. Once you are finished, click on the “Publish” button to make the product available for sale.

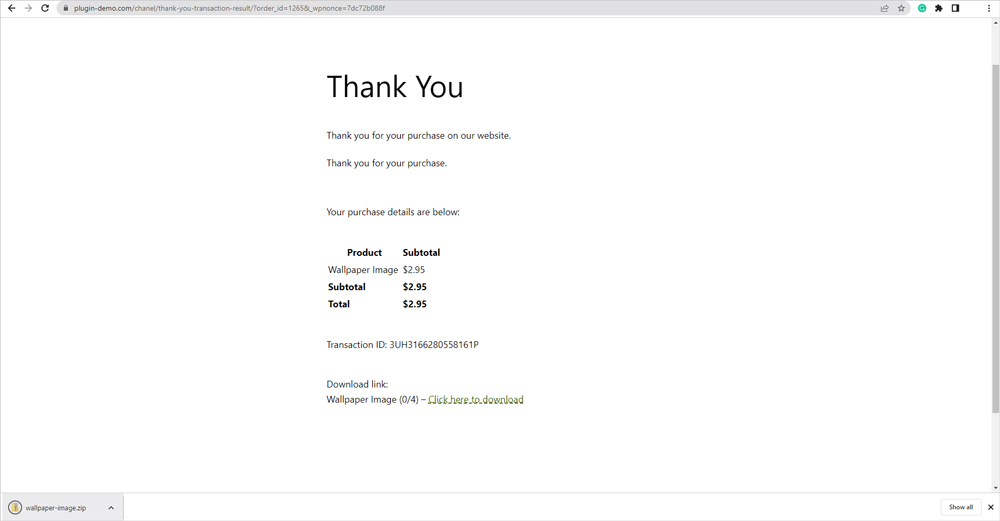
Once a customer buys your product, they can download the file immediately without any additional clicks by using the download link provided by the WP Express Checkout plugin. The digital content will be packaged in a compressed zip folder, and the customer will unknowingly download the product directly from your Google Drive.
